Spring Data Event Handler
Spring에서 Event를 다루는 방법이 있지만 포스팅에서는 Spring Data가 제공하는 Event를 다루는 법에 대해 사용하려 한다. Spring Data에서 제공하는 방법이 Spring framework가 제공하는 방법보다 간단하고 쉽다. 먼저 프로젝트를 만들고 build.gradle을 다음과 같이 설정해준다.
plugins {
    id 'org.springframework.boot' version '2.5.1'
    id 'io.spring.dependency-management' version '1.0.11.RELEASE'
    id 'java'
}

group = 'com.event'
version = '0.0.1-SNAPSHOT'
sourceCompatibility = '11'

configurations {
    compileOnly {
        extendsFrom annotationProcessor
    }
}

repositories {
    mavenCentral()
}

dependencies {
    implementation 'org.springframework.boot:spring-boot-starter-data-jpa'
    compileOnly 'org.projectlombok:lombok'
    developmentOnly 'org.springframework.boot:spring-boot-devtools'
    runtimeOnly 'com.h2database:h2'
    annotationProcessor 'org.projectlombok:lombok'
    testImplementation 'org.springframework.boot:spring-boot-starter-test'
}

test {
    useJUnitPlatform()
}
제일 간단하게 프로젝트를 설정했다. 데이터베이스는 h2를 사용했고 jpa 설정을 추가해줬다.
다음 Entity를 만들어주자.
@Entity
public class Foo extends AbstractAggregateRoot<Foo> {
    @Id
    @GeneratedValue(strategy = GenerationType.IDENTITY)
    private Long id;
    private String text;

    public Foo() {
    }

    public Foo(String text) {
        this.text = text;
    }

    public void registerEvent() {
        registerEvent(new FooEvent(text));
    }
}
평소 Entity와 다른점은 AbstractAggregateRoot를 상속받는 것이다. AbstractAggregateRoot는 Spring Data에서 제공하는 Event를 등록하기 위해서 사용한다.
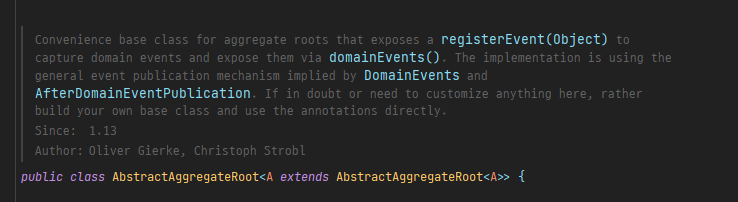
AbstractAggregateRoot를 상속받으면 registerEvent 함수를 사용할 수 있다. registerEvent 함수에는 전달할 객체를 넣어준다. 이를 위해 FooEvent 클래스를 생성해준다.
public class FooEvent {
    private final String message;

    public FooEvent(String message) {
        this.message = message;
    }

    public void printMessage() {
        System.out.println("This is Foo event message and " + message);
    }
}
FooEvent 클래스에는 Foo 엔티티에 있는 text값을 출력할 수 있는 함수를 정의해줬다.
이벤트를 발생시켰으면 이를 다룰 수 있는 Handler도 필요하다.
@Component
public class FooEventHandler {

    @Async
    @EventListener
    public void handle(FooEvent event) {
        event.printMessage();
    }
}
이벤트 핸들러를 Bean에 등록해주고 handle 함수를 만들어 준다. 이 handle 함수는 FooEvent를 매개변수로 받는다. 이 매개변수에 따라 이벤트를 처리하는 Handler가 구분된다. 즉 여러개의 이벤트를 등록해도 전달되는 Event객체에 따라 어떤 Handler에서 처리할지 정해진다는 것. 비동기 처리를 위해 @Async과 Event Handler라는것을 정해주는 @EventListenr를 붙여준다. @Async를 붙이지 않으면 동기식으로 처리된다.
Test
기본적인 세팅은 끝났으니 이제 테스트를 해보자. Spring Data의 Event는 해당 Entity가 save될 때 발생한다. 즉 명시적으로 save를 해줘야 한다. 보통 update를 위해 더티체킹을 이용하는데 Event를 발생시키기 위해선 명시적으로 save를 호출해줘야 한다.
@SpringBootTest
@Transactional
@Rollback
class EventHandlerApplicationTests {
@Autowired
FooRepository repository;
@Test
void contextLoads() {
Foo foo = new Foo("Hello World");
foo.registerEvent();
repository.save(foo);
}
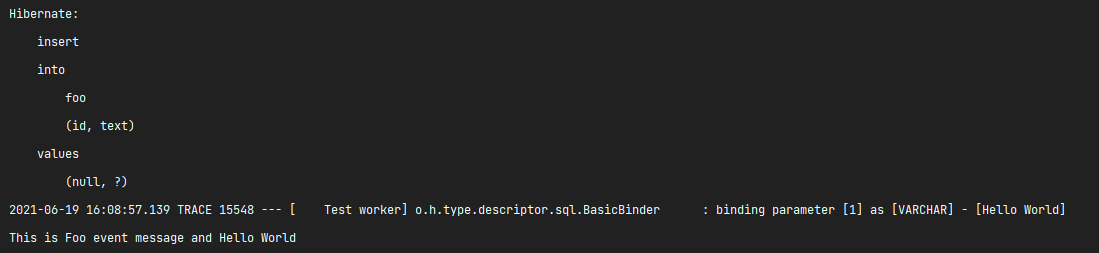
}테스트 코드에서 Entity 객체를 만들어주고 이벤트를 등록하는 함수를 실행해준다. 그 다음 이 객체를 save해주면 이벤트가 실행된다.
'spring' 카테고리의 다른 글
| Spring - Kafka 연동하기 (0) | 2021.12.04 |
|---|---|
| Spring에서 Http Request 보내기 - Feign (0) | 2021.09.19 |
| Custom HandlerMethodArgumentResolver (0) | 2021.06.08 |
| JWT를 이용한 인증 처리 (0) | 2021.05.29 |
| 테스트 코드 커버리지 확인하기 (jacoco) tutorial (0) | 2021.05.01 |


댓글